
How to Install Guttering
Guttering is an essential component of your home’s exterior, safeguarding the roofline, walls, and foundation from potential water damage. Learning how to install guttering yourself can be a rewarding DIY project that saves you significantly on labour costs. This guide will walk you through the installation process, ensuring your new system is practical, durable, and ready to handle heavy rainfall.
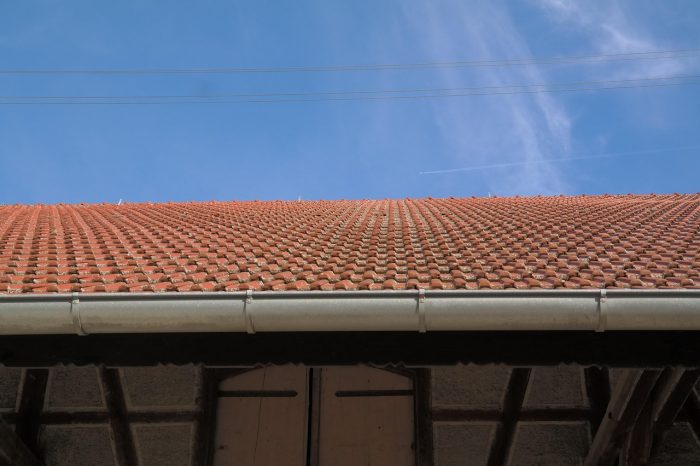
Step 1: Planning and Preparation
Before you begin, gather the necessary materials and establish a clear plan. This stage is crucial for ensuring a proper fit and slope.
Tools and Materials You’ll Need:
– Gutter sections
– Fascia brackets
– Joint connectors
– Stop ends
– Downpipe components
– String line
– Pencil
– Drill
– Screws
– Hacksaw (for cutting PVC) or metal shears (for metal systems)
– Gutter sealant (if required by your system)
Determining the Slope
Water flows downhill, so your guttering must have a slight slope, or “fall,” toward the downpipe outlet. A standard recommendation is a slope of either 1:350 or 1:600, meaning the gutter should drop 1mm for every 350-600mm of run.
- Mark the High Point: Identify the highest point on the fascia board, furthest from your desired downpipe location, and mark it.
- Mark the Low Point: Measure the total run of the gutter and calculate the required drop (for example, a 15-meter run at 1:500 needs a 30mm drop). Mark this low point at the downpipe outlet.
- Run a String Line: Stretch a taut string line between the high and low marks to guide the placement of all intermediate fascia brackets.
Step 2: Installing the Fascia Brackets
The brackets hold the gutter sections and define the slope, so proper placement is key when installing rain gutters.
- Install the Outlet Connector: Attach the downpipe outlet connector at the marked low point, ensuring it is flush against the fascia board. This piece will determine the starting point for your gutter run.
- Install the Fascia Brackets: Attach the remaining fascia brackets along the string line.
- Place the first bracket no more than 100mm from the end of the gutter run (or from the outlet).
- Space subsequent brackets according to the manufacturer’s instructions, typically every 600mm to 1000mm.
- Use screws appropriate for your fascia material (timber or uPVC).
- Visual Check: After all brackets are fixed, verify that the curve of each bracket aligns perfectly with the string line to maintain the correct slope.
Step 3: Fitting the Gutter Sections
With the brackets in place, it’s time to attach the guttering sections.
- Start at the Outlet: Position the first section of guttering, starting from the outlet connector.
- Clip into Brackets: Tilt the back edge of the gutter under the back clip of the fascia bracket, then rotate and push the front edge down until it clicks securely into the front clip.
- Connect Sections: Use gutter connectors or joiners to attach subsequent lengths of guttering. If using PVC systems, ensure you leave a small expansion gap, per the manufacturer’s recommendations, within the connector to accommodate temperature changes.
- Fit Stop Ends: Install a stop end at the very end of the gutter run to cap the system and prevent water spillage.
Step 4: Installing the Downpipe
The downpipe channels water from the guttering down to the ground drainage system.
- Attach the Elbow: Connect an offset bend (or two elbows) to the outlet piece to direct the downpipe back toward the wall.
- Measure and Cut: Measure the distance from the second elbow to the ground or the drainage connection point. Cut the downpipe section to this length using a hacksaw.
- Fix to the Wall: Secure the downpipe to the wall using pipe clips or pipe sockets, typically spaced every 1.8 meters (or three clips per story). Ensure the pipe is vertical and securely fixed.
- Connect to Drainage: The downpipe should discharge into a water butt, a soakaway, or directly into a ground drainage system via a shoe or plinth.
Step 5: Testing the System
The final step in installing your guttering system is to test its flow.
- Pour Water: Pour a bucket of water directly into the furthest end of the gutter.
- Check Flow: The water should flow smoothly down the slope and exit completely through the downpipe outlet.
- Inspect for Leaks: Check all joints and connectors for leaks. If you find a leak, dismantle the joint, apply sealant if needed, and re-connect it firmly.
How Much Does It Cost to Install Gutters?
A common question is, “How much does it cost to install gutters?” Pricing can vary significantly based on the material and whether you choose a DIY approach or hire a professional.
By following this comprehensive guide and opting for a DIY installation, with materials from Build & Plump, you can effectively manage costs and complete the project.
Comments are closed here.