
How to Lay Paving Slabs
As summer rolls around, many of us don our garden gloves and get ready to update our outdoor space with a fresh look. At Build & Plumb, we’re on hand to guide you through the best ways to lay your paving slabs to smarten up your outdoor space instantly. Our handy guide will leave you with a practical, hard-wearing surface you can enjoy for many summers.
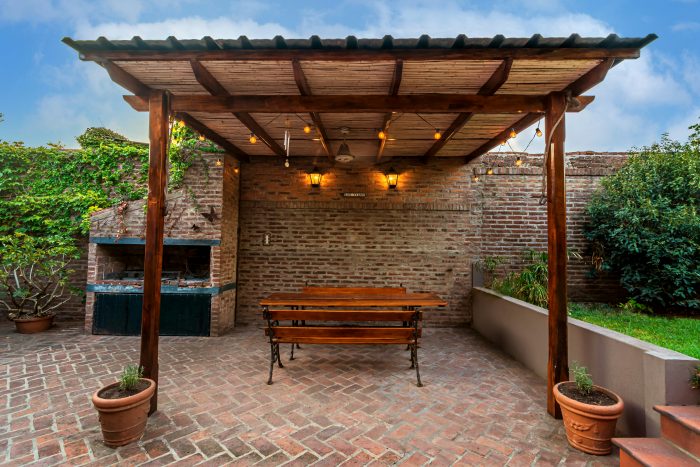
Taking on a paving project can feel daunting if you’ve no experience, but with the right tools, materials, and our solid plan, we’re confident it’s a job you can tackle. In this guide, we’ll take you through everything you need to know about laying paving slabs, from prepping the ground to setting that final stone and sitting back to enjoy your swanky new patio. Whether you’re a seasoned DIYer or a first-timer, you’re covered with our clear steps and expert advice on choosing the best products.
Disclaimer: If you’re unsure about your paving project, we recommend you enlist the help of a professional to install it or at least gain advice.
Understanding Your Paving Project
Before you go all gung-ho, sit down and plan your project. Careful preparation will help you achieve a more professional, clean finish that lasts for years to come.
Here are a few things to consider for your project:
Purpose: Determining the use of your slabs is essential to ensuring you select the right materials for the job; for example, a driveway will require much more robust slabs than a simple garden path feature.
Type: Okay, you’ve determined your use, but which slab will you choose? The market stocks a whole variety, including various colours, shapes, and sizes. It’s worth looking into this before selecting one randomly and then preferring your neighbours!
Layout: Will you choose traditional straight paving slabs, a staggered design, or a more random look? Sketch out your plan and accurately measure your space to calculate the number of needed slabs.
Ground Conditions: Checking that water will have adequate drainage to avoid damage is essential for any area you want to pave. After assessing the area, decide if you must create a gentle slope to direct rainwater away from your property and consider which type of sub-base and materials will suit your soil and provide a stable foundation.
Tools Needed for Laying Paving Slabs
- Paving slabs
- Sub-base material (MOT Type 1 or crushed stone)
- Sharp sand, water, cement (mortar mix)
- Concrete breaker (if needed)
- Spirit level
- Rubber mallet
- Shovel
- Pointing Trowel
- Tape measure
- String line and pegs
- PPE (gloves, knee pads, safety glasses)
Step-by-Step: How to Lay Paving Slabs
- Prepare the Area
Mark out your preferred sections with a string and pegs. Once you’ve done this, measure the dimensions and calculate the area in square metres by multiplying the width by the height.
Then, calculate how much mortar and subbase you will need. Once compacted, we recommend a subbase of DTP1 Hardcore (MOT Type 1) at least 150 mm in depth and a calculated laying course of 50-mm-deep for full concrete mix mortar bed.
How much sand, cement and other aggregates do I need?
150mm compacted sub-base of DTp1 Hardcore (MOT Type 1), 50mm full bed laying course of 5:1 mortar (sharp sand and cement). You should typically use a 5:1 ratio of bedding mortar for all slab types.
Shall I dry lay?
Dry laying is a practice run to test your slabs’ laying pattern, coverage and colour blend/mix. Simply place the slabs over where they will eventually be laid and check that everything looks good before you set them in stone! We recommend of 5-15 mm between stones to allow for expansion and contraction due to temperature changes and to allow for jointing materials to be laid.
This is also an excellent opportunity to mix and match your slabs to achieve the perfect look in your garden. Consider numbering the underside of your slabs for easy laying so that you can replicate your dry lay exactly.
As stated earlier, when planning, consider adding a gentle slope to your patio to account for surface water. This is usually calculated at 80:1 drop per metre in the direction you want the paving to drain, but a ratio of 60:1 can be used when necessary.
- Dig Out the Patio
With your section already marked out, now is the time to dig out the area and create a substrate, ensuring it’s free of lumps, hollows, and dips. Start with a datum line running between the highest edge of your patio. A datum line is a level line that serves as a reference point for the rest of your project. Remember that this line must be lower than the damp proof course to ensure the patio does not disrupt your property’s protection.
The datum line should also protect your slabs’ left and right edges. You can ensure this process by running them at a 90-degree angle using the 345 Pythagorean triangle method, guidelines, and a tape measure, or you could use a builder’s folding square.
When working out the depth of your digging, factor in.
- 100-150mm subbase
- 40-50mm mortar bed
- 15-30mm paving slabs
- Plus, any fall at the lower end of the patio run.
- Lay the subbase
When it comes to your paving, stability is key. Once you’ve gauged your required fall, added a datum line from the top of your patio and measured the required gradient of the fall, knock in staves at 1m or 2m intervals, with the top of each representing the necessary depth from hardcore sub-base.
Using a wacker plate ensures your sub-base is compact and even with a depth of 150mm. Don’t worry; you can hire them from anywhere between £26 and £85, with some companies offering bundle deals that include a plate and a full petrol tank. This should be done in a series of layers to add maximum strength and stability to your sub-base.
- Mix the Mortar
We recommend a 5:1 mix of sharp sand to cement for ordinary use, which will provide optimum strength and bonding. You can add an SBR bond to your mortar mix to increase its elasticity and water resistance.
If you need more scope to make fine adjustments, you could mix builders’ sand instead of sharp sand. However, this will weaken your mortar mix and, over time, may cause cracks or shrinkage.
Ensure your mortar is not too wet or dry. It should have a creamy texture and be pliable. It should also form small peaks above the line of the laying course, ensuring an even spread when you tamp down your paving stones.
If you’re laying porcelain paving slabs, a priming slurry is necessary to aid adhesion between your bedding mortar and slabs, as they have less grip and natural bonding than more porous stones. However, we recommend you apply a priming slurry to the underside of all your slabs no matter the material before laying them, as this will naturally improve adhesion and provide you with additional protection from all elements.
- Lay the Paving Slabs
By laying your patio slabs on a full bed of mortar, you’ll prevent voids from forming, which will collect water and cause various issues, from dampness to subsidence.
Trowel the cement mix into small peaks above the height of your laying course guide where your slab will be placed. This ensures that when you tamp the slab down, it receives a stable bed. Don’t forget to include 5-15mm gaps between your stones to achieve a fantastic aesthetic.
- Allow 24 hours
Leave your slabs undisturbed for at least 24 hours to allow the cement mixture to set. This means ensuring nobody walks over them.
- Pointing
You must now fill the gaps between your slabs with an appropriate pointing material. A jointing compound is required for concrete and stone slabs, and exterior grout should be used for porcelain.
Benefits of jointing compound
- Can be done in any weather conditions
- Easy installation (simply brush in)
- Suitable for most materials
- Pet safe
- No curing time (fast application)
- No waste
- Prevents weed growth
If you’re going to use paving grout, our experts at Build & Plumb have some handy tips.
- Ensure you add the precise amount of water to the powder.
- Use clean water and a clean bucket.
- Ensure the mix is smooth and free of lumps.
How to apply jointing compound:
Pre Soak the area, the wetter the better.
Open the tub and empty contents on to the paving and add water to form a slurry.
Using a broom sweep the compound across the paving to fill in the joints. Any soft lumps of compound can be easily broken down but if the lump is solid take care to discard this piece.
It’s then recommend that the joints are ironed for a more aesthetically pleasing finish and improved structural integrity.
- Sealing
Concrete paving is permeable, meaning it is vulnerable to all types of damage as a result of water absorption, including;
- Freeze-thaw erosion, when water in the slabs expands and contracts as ice forms, weakening the slab and causing delamination.
- Chemical erosion can occur if you live in an area with more acidic water.
- Efflorescence (salt deposits on the paving slabs form through capillary action)
- Moisture can cause iron staining.
To avoid the following issues, there are two types of water-based sealers for paving that you can use to protect your patio: a natural finish that leaves the stone identical to its previous state or a colour-enhancing finish that darkens the stone, enhancing its vibrancy.
FAQ about how to lay paving slabs.
How to lay paving slabs on soil
The process is much the same as laid out above, but there will be significant differences in finish and stability. If you lay your paving slabs directly onto soil, they will be lower and more prone to movement and sinking, meaning they may shift and crack over time.
Soil can also lead to water pooling and sink your stones.
If you want longevity in your stones, it’s best to lay a sub-base, but for decorative garden stones, it may be possible to skip this step and lay them directly onto your soil.
How to lay paving slabs on sand
Again, this is much the same process as laying a sub-base. However, if you’re thinking about laying directly onto sand, be prepared for your paving slabs not to be as stable or have as much longevity. However, they will be more stable than soil.
Laying paving slabs on sand will be fine for temporary footpaths and light garden decor.
Regarding your new patio, we’re confident our extensive collection of paving slabs, sealers, and cement has everything you need to achieve the garden patio of your dreams. If you need advice on your stones regarding their delivery, quality, or price, our team is on hand to help. Alternatively, our guidance page could be the answer to any product-related queries!
Comments are closed here.